Showing posts with label OUGD201 - Print. Show all posts

Wednesday, 13 October 2010

InDesign.

Always work on a Document.
Even if you want to print a book, use facing pages.

Working for commercial print:

Photoshop:
-Resolution 300 dpi
- CMYK, Grayscale, Duotone,
-File Format, psd or tiff to put into InDesign.
-Make your work actual size you want it to move into InDesign.

Illustrator:
-CMYK
-File Format ai. Don't cut and paste artwork.

When you place and image into InDesign it creates a link. So if you go to the links menu at the side and scroll over the image name it will tell you where the image is.

So when you got to print you need to take the InDesign document and all the images you want.

Make a folder for all things you have used in your InDesign layout and take this along to the printer so it prints everything.

Fonts & images need to be stored in a folder alongside the Indesign document

Separations:

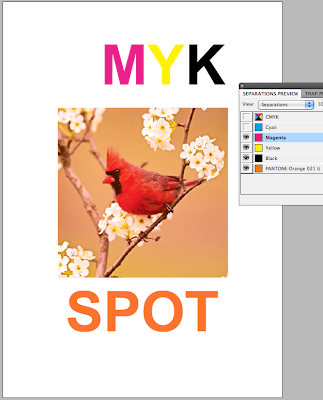
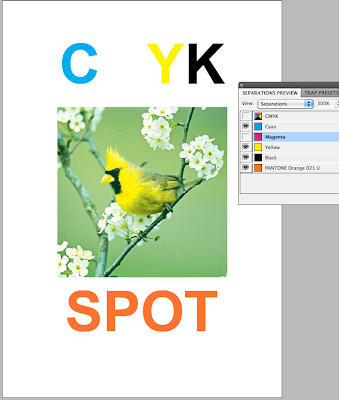
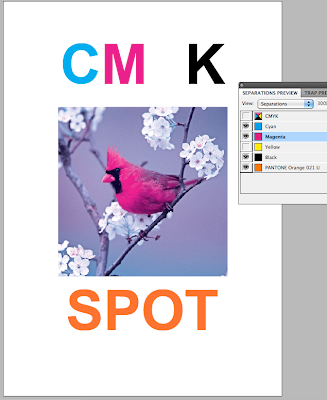
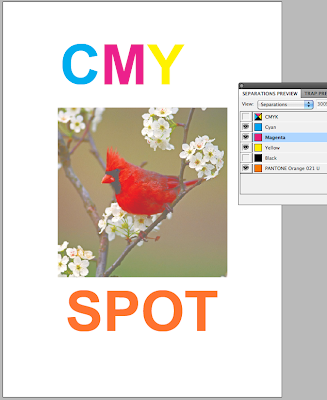
Colour separations is to see how many different printing plates you would need for your work. Such as screen printing when you have to print each colour seperatly.

Windows - Outputs - Seperations.
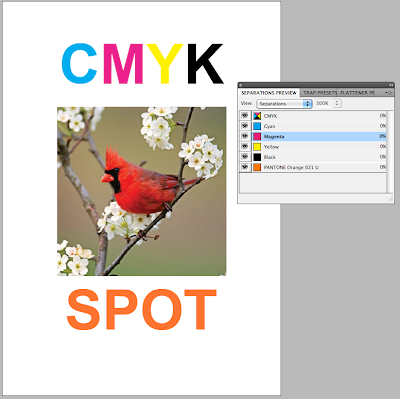


When printing if you go to Output then select separations from the drop down menu, this will then print 5 separate sheets of the same design for each of the different colours. All of which will be in black and white format.

The more colours means more printing plates needed which means the price of the print job will go up and become more and more expensive.

When designing for print, good practice is to clear your swatches from all un used spot colours so there is no confusion of what is going to be printed.

Also when printing add the printing information onto the document such as crop marks and the registrations.

Overprint.

Window - Output - Attributes.

Overprinting allows you to print a two colour document, so using two plates, overprinting would allow you to create another colour from your chosen two colours mixing. Knocking out is when the overprint is not selected and the spot colour will knock out the background rather than print on top of it.

Ink Limit: ink limit is the amount of ink that can be applied to your stock before it starts to discintigrate. Once you know what your stock is and how much it can take..

Once you know this in the separations menu you can go on the drop down menu and select ink limit and set your ink limit. So when overprinting if there is too much ink on the page it will highlight it.

Spot colour - when it goes to print in your swatches you have the colours you have used on your design then add another spot colour to the swatches and ask the printer to not print the spot colour but to spot varnish where that colour is. But make sure that the overprint setting is used with the spot colour so that the colour isn't knocked out, as it wants to be printed on top of the picture behind rather than loose the picture where the spot colour is.


Wednesday, 6 October 2010


i created this square above in RGB mode..

This green square above is the closest match in CMYK you can get for the square in RGB mode!

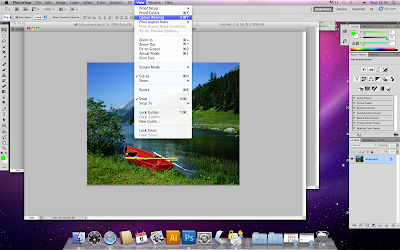
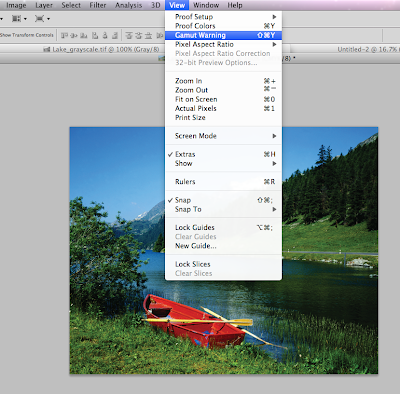
Photoshop is designed to work in RGB however when creating a design for print there are much fewer colours in CMYK thanRGB, so when using RGB mode you can go onto Gamut warning and this will then highlight the colours of which cannot be printed.

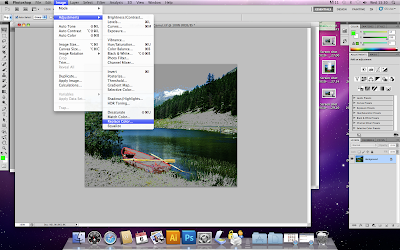
When the colours that cannot be printed in CMYK are highlighted they are turned grey. To reduce the amount of colours which cannot be printed you can adjust the saturation, which will put the colours back into CMYK to print.


There is also another way to change the colours to transform them into CMYK which is replace colour. This highlights the colours that cannot be printed then you can click on a selection and replace colour will offer you the option to choose a pantone colour to replace the RGB colour.


Monotone - choosing one pantone colour and transforming your image into that one colour with various tones of that one colour. Making this a one colour print.


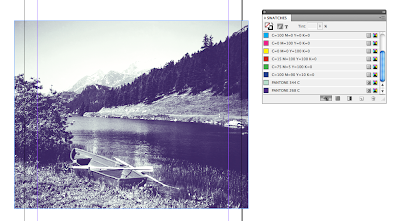
Duotone - the use of two colours in an image. Also with the curves option next to the colours you have chosen you can adjust how much of each colour you want to use and how dark you want it.


After making and saving your image once you load it into InDesign the two colour swatches are added to the swatches in InDesign.

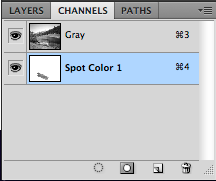
To Create a Spot Colour..
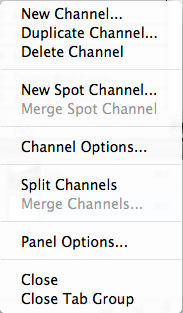
click on the small menu bar at the side of the layers,channels and paths. Then chose New Spot Colour. Double click on the Spot Colour and you can chose a pantone colour from the menu to use in your design.

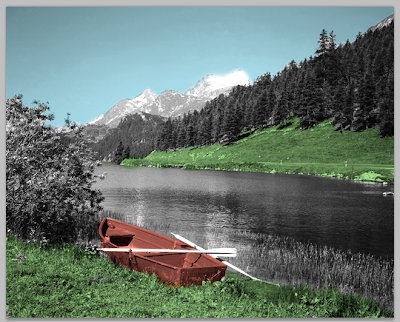
spot colour examples.....


Tuesday, 5 October 2010

Content & Categories:

-Graphic design tutorials, production and printing techniques. Design Basics, Colour, Pre-press, Production & Finishing.

Form & Format:

-Glued manual - 29.9 x 21.9, hard back. Some pages coated, mainly uncoated. Spot colour on the front and inside pages.

Product & Range

-Just the one book, there are no extras along the same design.

Media & Process:

-Content relates to what you are looking for/function. Interests people by the different stocks and layouts. Web - mass volume printing and quick speeds.

Audience & Interaction

-Market Pull, the book has been asked for not pushed upon people. Design students, they don't so much interact with the book itself yet get information from it.

Form & Function

-To educate & inform, to teach the reader.

Scale & Context:

-Managable reading size, although quite heavy so hard to hold for long. Specialist market - designed for design students so can't cut corners.
FORM.FUNCTION.PRODUCTION

Content & categorisation:

-Come up with loads of ideas.
-Do something that excites you
-Exploit every idea/pathway, unpick everything
-What don't people know about it
-What do people want to know about it
-Be informed

Form & Format

-How can it inspire what i'm doing?
-What packaging could give me the inspiration?
-What could the product be like instead of paper based?

Product & Range

-When you've made a product what else can you make to add to it/ improve it

Media & Process

-What process could you use to enhance your idea?

Audience & Interaction

-How will you interest you audience?
-How will they interact with the audience?

Form & Function

-Has to communicate your idea but still be interesting

Scale & Context

-What forms could you do.. Think BIG!
Design Production - Print
29.09.10

Product name: Mouse.
Process: Flexography, as there is a seam down the bottle which suggests it was printed falt then made into the bottle.
Colours: 4 colour print.
Stock: aluminium, a cheap material and easy to print onto.
Format: Standard shape/size.
Specials: special coating over the bottle.
Target: women, any hair colour - possibly older women & also on a budget.
Cost band: average cost for a normal size and shaped bottle.
Quantity: Millions as there are hundreds of stores.
Competition: Other competitors have gone for bold eye catching colours & pretty extreme. But this one hasn't, with golds and silvers also looks more elegant than 'cool'.

Product name: Inbetweeners dvd case.
Process: Flexography, as there will have been a lot to print.
Colours: CMYK.
Stock: cardboard, a cheap material and serves its purpose.
Format: Standard shape/size.
Specials: Perforated & Spot varnishing.
Target: Teens-35
Cost band: average cost for a normal size and shaped case.
Quantity: Millions as they are watched in America too.
Competition: All other dvds have the same sort of sleeve to protect the dvd case and to add more information.

Product name: Sainsburys Cool Bag.
Process: Offset Lithography
Colours: duotone
Stock: cellophane and plastic.
Format: Standard shape/size.
Specials: Folded and glued down the edges.
Target: mothers and grandmothers.
Cost band: budget to serve its purpose.
Quantity: Millions as there are hundreds of stores.
Competition: Morrisons and Asda and Tescos also do these sorts of bags.

Monday, 4 October 2010


MAC Illustrator Workshop.
29.09.10

Swatches. In the workshop we were shown how to start from scratch and make your own swatches for your design.

Below shows how we created our own swatches then made them a 'Global' swatch.

Once the colour is a global swatch it allowed you to not changed the colour itself just change the tones.

Swatches - double click - tick Global - Make tints.

Also when printing we were told that if you sent your piece of work to the printers with a list of the pantone colour references, you could then use a pantone colour not on the list to select sections on your work of which you would want spot varnishing. And just make sure to let the printer know that that specific colour is for spot varnishing.

Also if you wanted a cmyk reading of a spot colour you can:

colour groups - colour guide - edit colours.